 Save
Save I used to toss onion skins and carrot nubs without a second thought until a rainy Tuesday when the pantry was bare. Looking at the pile of trimmings on my cutting board, I realized I was holding the soul of a soup. Now, my freezer is a graveyard of vegetable ends waiting for their second life. There is something incredibly grounding about transforming what most people call trash into liquid gold. It makes the kitchen feel like a place of actual alchemy rather than just a room for chores.
Last winter, I hosted a small dinner party where the risotto tasted remarkably deep and savory. My friends kept asking for the secret ingredient, expecting some expensive truffle oil or imported spice. I laughed because the magic came from a bag of frozen leek tops and mushroom stems I had been saving for weeks. That night taught me that the best flavors often come from the things we overlook.
Ingredients
- Vegetable Scraps: Using carrot peels and onion skins provides that classic amber color and sweetness.
- Aromatics: Peppercorns and bay leaves add a subtle heat and herbal depth that balances the earthiness.
- Cold Water: Starting with cold water allows the flavors to extract slowly as the temperature rises.
- Garlic: Crushing the cloves with the side of a knife releases the oils more effectively into the liquid.
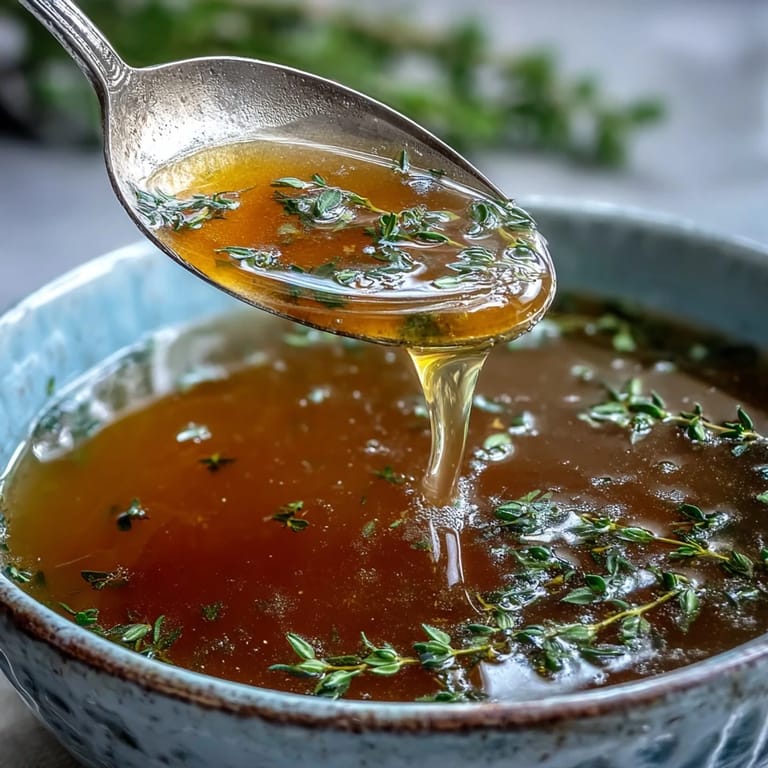
- Thyme: A single sprig of thyme brings a woody aroma that lingers beautifully in the finished broth.
Tired of Takeout? 🥡
Get 10 meals you can make faster than delivery arrives. Seriously.
One email. No spam. Unsubscribe anytime.
Instructions
- Prepare the scraps:
- Toss your clean trimmings into the pot ensuring you avoid bitter greens like kale or broccoli.
- Simmer the mixture:
- Cover the vegetables with cold water and bring the pot to a very gentle bubble.
- Extract the essence:
- Let the broth cook uncovered for nearly an hour while the kitchen fills with a savory scent.
- Strain the liquid:
- Pour the broth through a fine mesh sieve into a clean bowl to catch every bit of sediment.
- Cool and store:
- Allow the liquid to reach room temperature before transferring it to jars for the fridge or freezer.
 Save
Save One evening, my youngest sibling sat at the counter watching me sort through colorful scraps of purple onion and orange carrots. We talked about how nothing is truly wasted if you have a bit of patience and a pot of water. It became a quiet ritual we shared every Sunday afternoon.
The Magic of Roasting
Whenever I want a deeper and more robust broth, I roast the scraps on a baking sheet first. The caramelization adds a smoky sweetness that works perfectly for hearty beefless stews or gravies.
Identifying the Best Scraps
I have learned to keep a dedicated bag in the freezer for the high quality trimmings like celery hearts and leek greens. Avoid using too many starchy peels like potatoes because they can make the broth cloudy and thick.
Mastering the Umami Balance
Getting that savory punch usually found in meat broths requires a few clever additions from the pantry. I often reach for a piece of dried seaweed or a few sun dried tomatoes to boost the complexity.
- Add a dried shiitake mushroom for an instant hit of savory richness.
- A splash of soy sauce can provide both salt and a beautiful dark color.
- Always taste the broth near the end of the simmer to check if it needs more salt.
 Save
Save Making your own broth is a small act of rebellion against a throwaway culture. It makes every meal you cook afterward feel a little more intentional and nourishing.
Recipe Questions & Answers
- → What vegetable scraps work best for broth?
Carrot peels, onion skins, celery ends, leek tops, mushroom stems, parsley stems, and garlic skins create excellent depth. Avoid potato peels, brassicas (broccoli, cauliflower, cabbage), and overly starchy vegetables as they can cause bitterness or cloudiness.
- → How long does homemade vegetable broth last?
Properly stored in airtight containers, the broth keeps refrigerated for up to 5 days. For longer storage, freeze in portion-sized containers for up to 3 months without losing quality or flavor.
- → Can I customize the flavor profile?
Absolutely. Roast scraps at 200°C (400°F) for 20 minutes before simmering for deeper, caramelized notes. Add kombu seaweed or dried mushrooms for extra umami, or adjust herbs like thyme, bay leaf, and peppercorns to your taste preferences.
- → Why should I avoid adding salt?
Keeping the broth low-sodium allows versatility when using it as a base for other dishes. You can always season individual dishes later, but you can't remove excess salt once it's added. This approach gives you complete control over sodium levels.
- → What's the best way to strain the broth?
A fine-mesh sieve works well for clear results, but layering cheesecloth inside captures even the smallest particles for an exceptionally clean, golden broth. Press gently on solids to extract liquid without forcing cloudiness into your final product.
- → How can I use this broth beyond soups?
This versatile liquid shines as a cooking liquid for grains like rice and quinoa, adds depth to risottos, deglazes pans for sauces, or can be enjoyed warm as a soothing, nourishing drink on its own with fresh herbs.