 Save
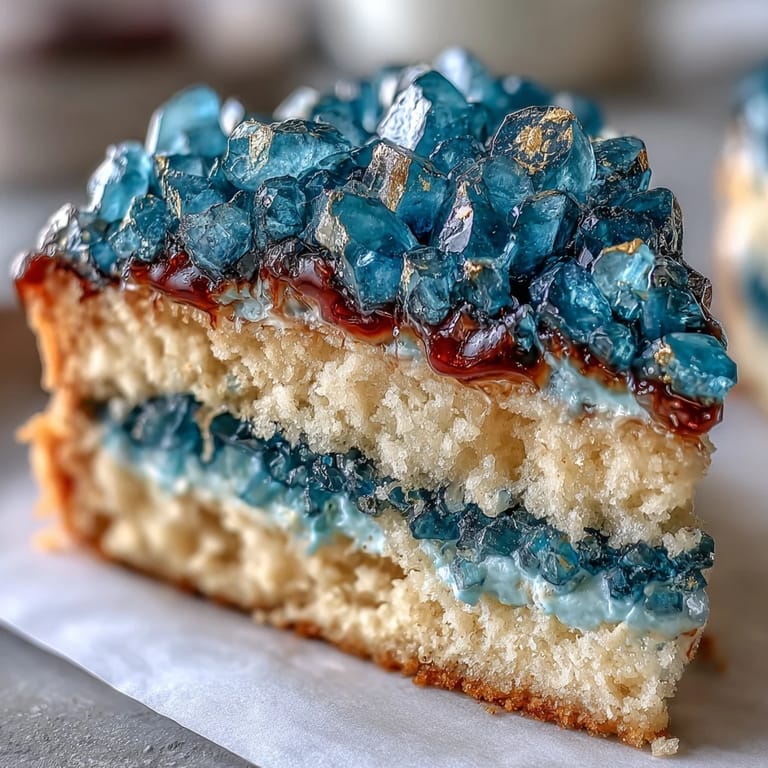
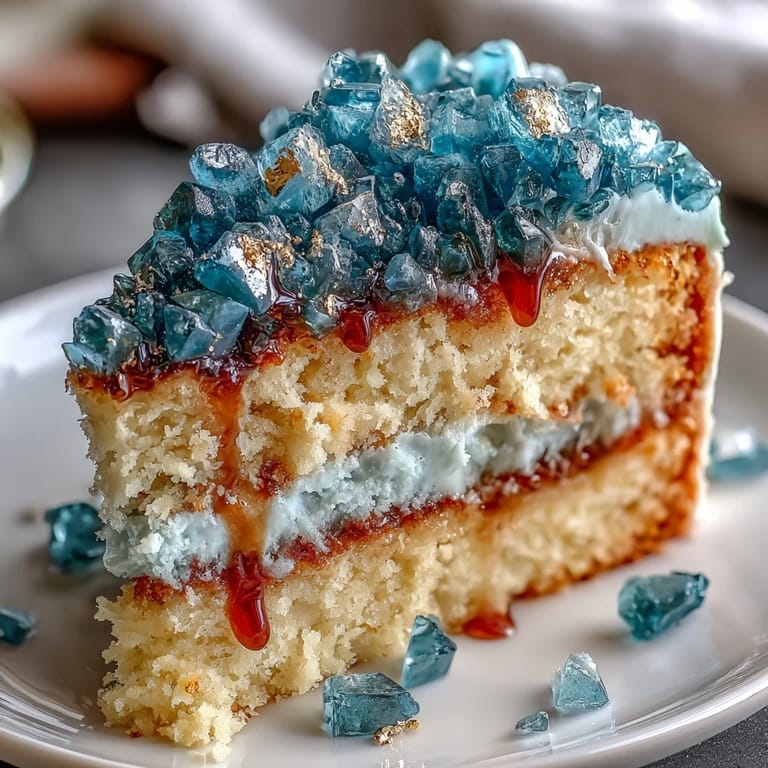
Save The first time I tried a geode cake, I didn t expect to find bits of sugar crystal scattered across my kitchen floor for days. The glimmering teal and bursts of gold caught the light in just the right way, making the whole kitchen feel like a transformed, festive place. There was an air of anticipation as I mixed the food coloring into the sugar, watching the transformation unfold. Sometimes the satisfaction comes as much from the process as from the result. Setting out to make this cake, I wanted a graduation celebration to feel as special as the memories it marked.
When I baked this for my neighbor s college graduation last spring, the kitchen was buzzing with excitement and a little impatience from eager taste-testers. Everyone gravitated toward the cake as soon as it appeared, phones out, wanting to capture the sparkling teal sugar before a single piece was cut. As I applied the gold trim, my niece kept trying to nudge a sugar crystal loose—she s convinced they re magic. The celebration felt elevated, but with that touch of playful fun that bright cakes always bring. Watching people light up at the first slice made all the detail work worth it.
Ingredients
- All-purpose flour: The base for a soft, sturdy cake—I always sift it for extra lightness.
- Baking powder: This guarantees a good rise—I ve learned to check freshness before starting.
- Salt: A pinch brings out all the sweeter flavors, and skipping it leaves the cake bland.
- Unsalted butter, room temperature: Letting it fully soften gives you that fluffy, creamy base for both cake and buttercream.
- Granulated sugar: Creaming this properly with butter is what gives the cake its delicate crumb.
- Large eggs, room temperature: They mix in smoothly without curdling, essential for a uniform batter.
- Vanilla extract: Quality vanilla gives the cake its warmth—splurge on the good stuff if you can.
- Whole milk: Adds richness and moisture; pouring it in alternately with dry ingredients helps prevent lumps.
- Powdered sugar, sifted: Keeps the buttercream cloud-like—never skip the sifting, or you ll fight clumps.
- Heavy cream or milk: Adjust to get the perfect spreadability for your frosting.
- Teal gel food coloring: Gel is much more vibrant and won t water down your buttercream.
- Rock sugar crystals (clear or white): The magic behind the geode—use big chunks for drama.
- Edible gold leaf or gold luster dust + clear alcohol: For painting those luxe edges, and believe me, this step makes people gasp.
- Simple syrup (optional): Brushing it on the cake layers keeps everything ultra-moist, especially helpful if making ahead.
Tired of Takeout? 🥡
Get 10 meals you can make faster than delivery arrives. Seriously.
One email. No spam. Unsubscribe anytime.
Instructions
- Mix the dry ingredients:
- Grab a mixing bowl and whisk together the flour, baking powder, and salt until combined.
- Cream butter and sugar:
- With your mixer on medium, cream the room temperature butter and granulated sugar until it s light and fluffy, taking a moment to enjoy the sweet aroma.
- Add eggs and vanilla:
- Crack in the eggs one at a time, beating in between, then blend in the vanilla extract for that rich, comforting scent.
- Combine and finish the batter:
- Add the flour mixture in thirds, alternating with the milk, and mix just until no streaks remain—the batter should feel silky but not runny.
- Bake the cakes:
- Divide the batter into the prepared pans, smooth the tops, and bake for 28–32 minutes until golden and set—your kitchen will smell like a bakery.
- Cool completely:
- Let the cakes rest in their pans before transferring to racks, so you don t lose their shape.
- Make the buttercream:
- Beat butter until creamy, gradually add powdered sugar and vanilla, then adjust texture with heavy cream—reserve some uncolored for crumb coating and tint the rest a jewel-toned teal.
- Dye the sugar crystals:
- Drop teal gel coloring onto rock sugar and stir gently until they re vibrantly colored, then let them dry so they don t bleed into your frosting.
- Level and layer:
- Trim cakes flat if needed, brush with simple syrup for extra moisture, then stack with even layers of buttercream.
- Crumb coat and chill:
- Spread a thin veil of uncolored buttercream over the cake to lock in crumbs, and chill to set everything in place.
- Frost the cake:
- Cover the whole cake in smooth teal buttercream, using long strokes along the sides and top for that flawless finish.
- Carve the geode:
- Use a serrated knife to cut a wedge from the cake’s side, like slicing out a gemstone, revealing the inner layers.
- Insert sugar crystals:
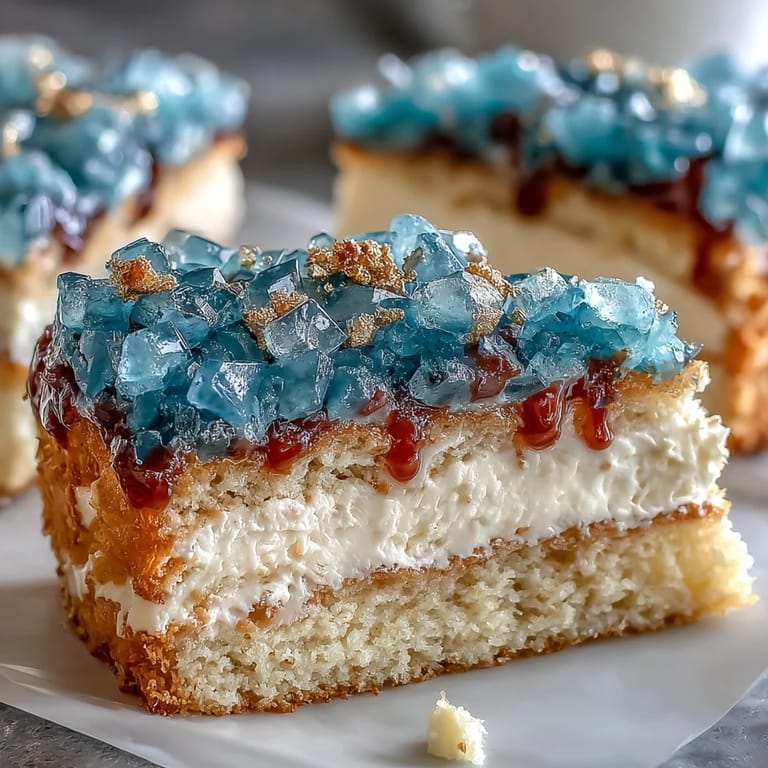
- Spread buttercream inside the crevice, then press teal sugar crystals, clustering lighter pieces at the center and blending to darker at the edges for real geode depth.
- Add the gold:
- With a food-safe brush, paint around the geode’s edge with gold leaf or luster dust mixed with alcohol, making the whole design pop.
- Finishing touches:
- Dab extra gold details wherever you like and place a graduation topper if you want a final celebratory flourish.
 Save
Save The moment we cut into this cake at the party and revealed that sparkling geode slice, someone gasped and whispered, That s almost too pretty to eat. But five minutes later, all that was left were a few sugar crystals and plenty of happy faces. That transformation—from centerpiece to shared memory—made the hours of decorating fade into a blur of laughter and clinking glasses.
Getting the Geode Look Just Right
The real secret is taking your time arranging the sugar crystals. I ve found it helps to step back and squint at the cake to check the gradient and make sure the edges curve in a way that mimics nature. Don t worry if the cut edges aren t perfect; the gold leaf disguises any uneven lines. Even the smallest sugar fragments add sparkle, so save them for filling tiny crevices.
Choosing Your Colors and Flavors
If teal isn t your style, a deep purple or sapphire blue looks incredible too. Swapping vanilla for almond or lemon extract gives the whole cake a bright twist. I once mixed a touch of blue and teal coloring together for more dimension—tiny changes can make the design truly yours.
Helpful Decoration Reminders
Decorating a geode cake is part art, part improvisation, so let yourself play a bit.
- If gold leaf tears, just patch it on and it ll still shine.
- Don t overload the geode—less is often more when it comes to sugar crystals.
- Chill the cake a final time before serving for sharp edges and neat slices.
 Save
Save No matter how many times I make this, slicing in and revealing the glittering geode feels magical. I hope it brings a moment of celebration to your table too.
Recipe Questions & Answers
- → How do you achieve the vibrant teal geode effect?
Tint sugar crystals with teal gel food coloring and press them into buttercream exposed in a carved slice for a gemstone effect.
- → What type of cake base is used?
A classic vanilla cake provides a light, moist base that complements the rich buttercream and decorative accents well.
- → What tips help the gold geode edges stand out?
Brush the sugar crystal edges with edible gold leaf or gold luster dust for a striking metallic finish that adds definition.
- → Can I customize the flavor or colors?
Absolutely! Add almond or lemon extract to the batter, or blend different food colorings for varied geode crystal shades.
- → Is this suitable for beginners?
Intermediate bakers will find it approachable with patience, but clear instructions for cake building and decorating make it accessible.
- → What tools are essential for decorating?
Use an electric mixer, offset spatula, serrated knife, and a food-safe paintbrush for smooth finishing and precise gold application.